Excavator Pin & Bush Diagram — UK Construction Equipment Guide
Replacing pins and bushes is one of the most common rebuild jobs on any excavator, loading shovel or backhoe. Get the wrong size and the boom rattles, the bucket slops, and wear accelerates on every other linkage in the chain. This guide gives you a labelled position diagram covering every pin and bush location on a typical UK construction excavator, so you can identify what you need before ordering replacements.
Pin & Bush Position Diagram
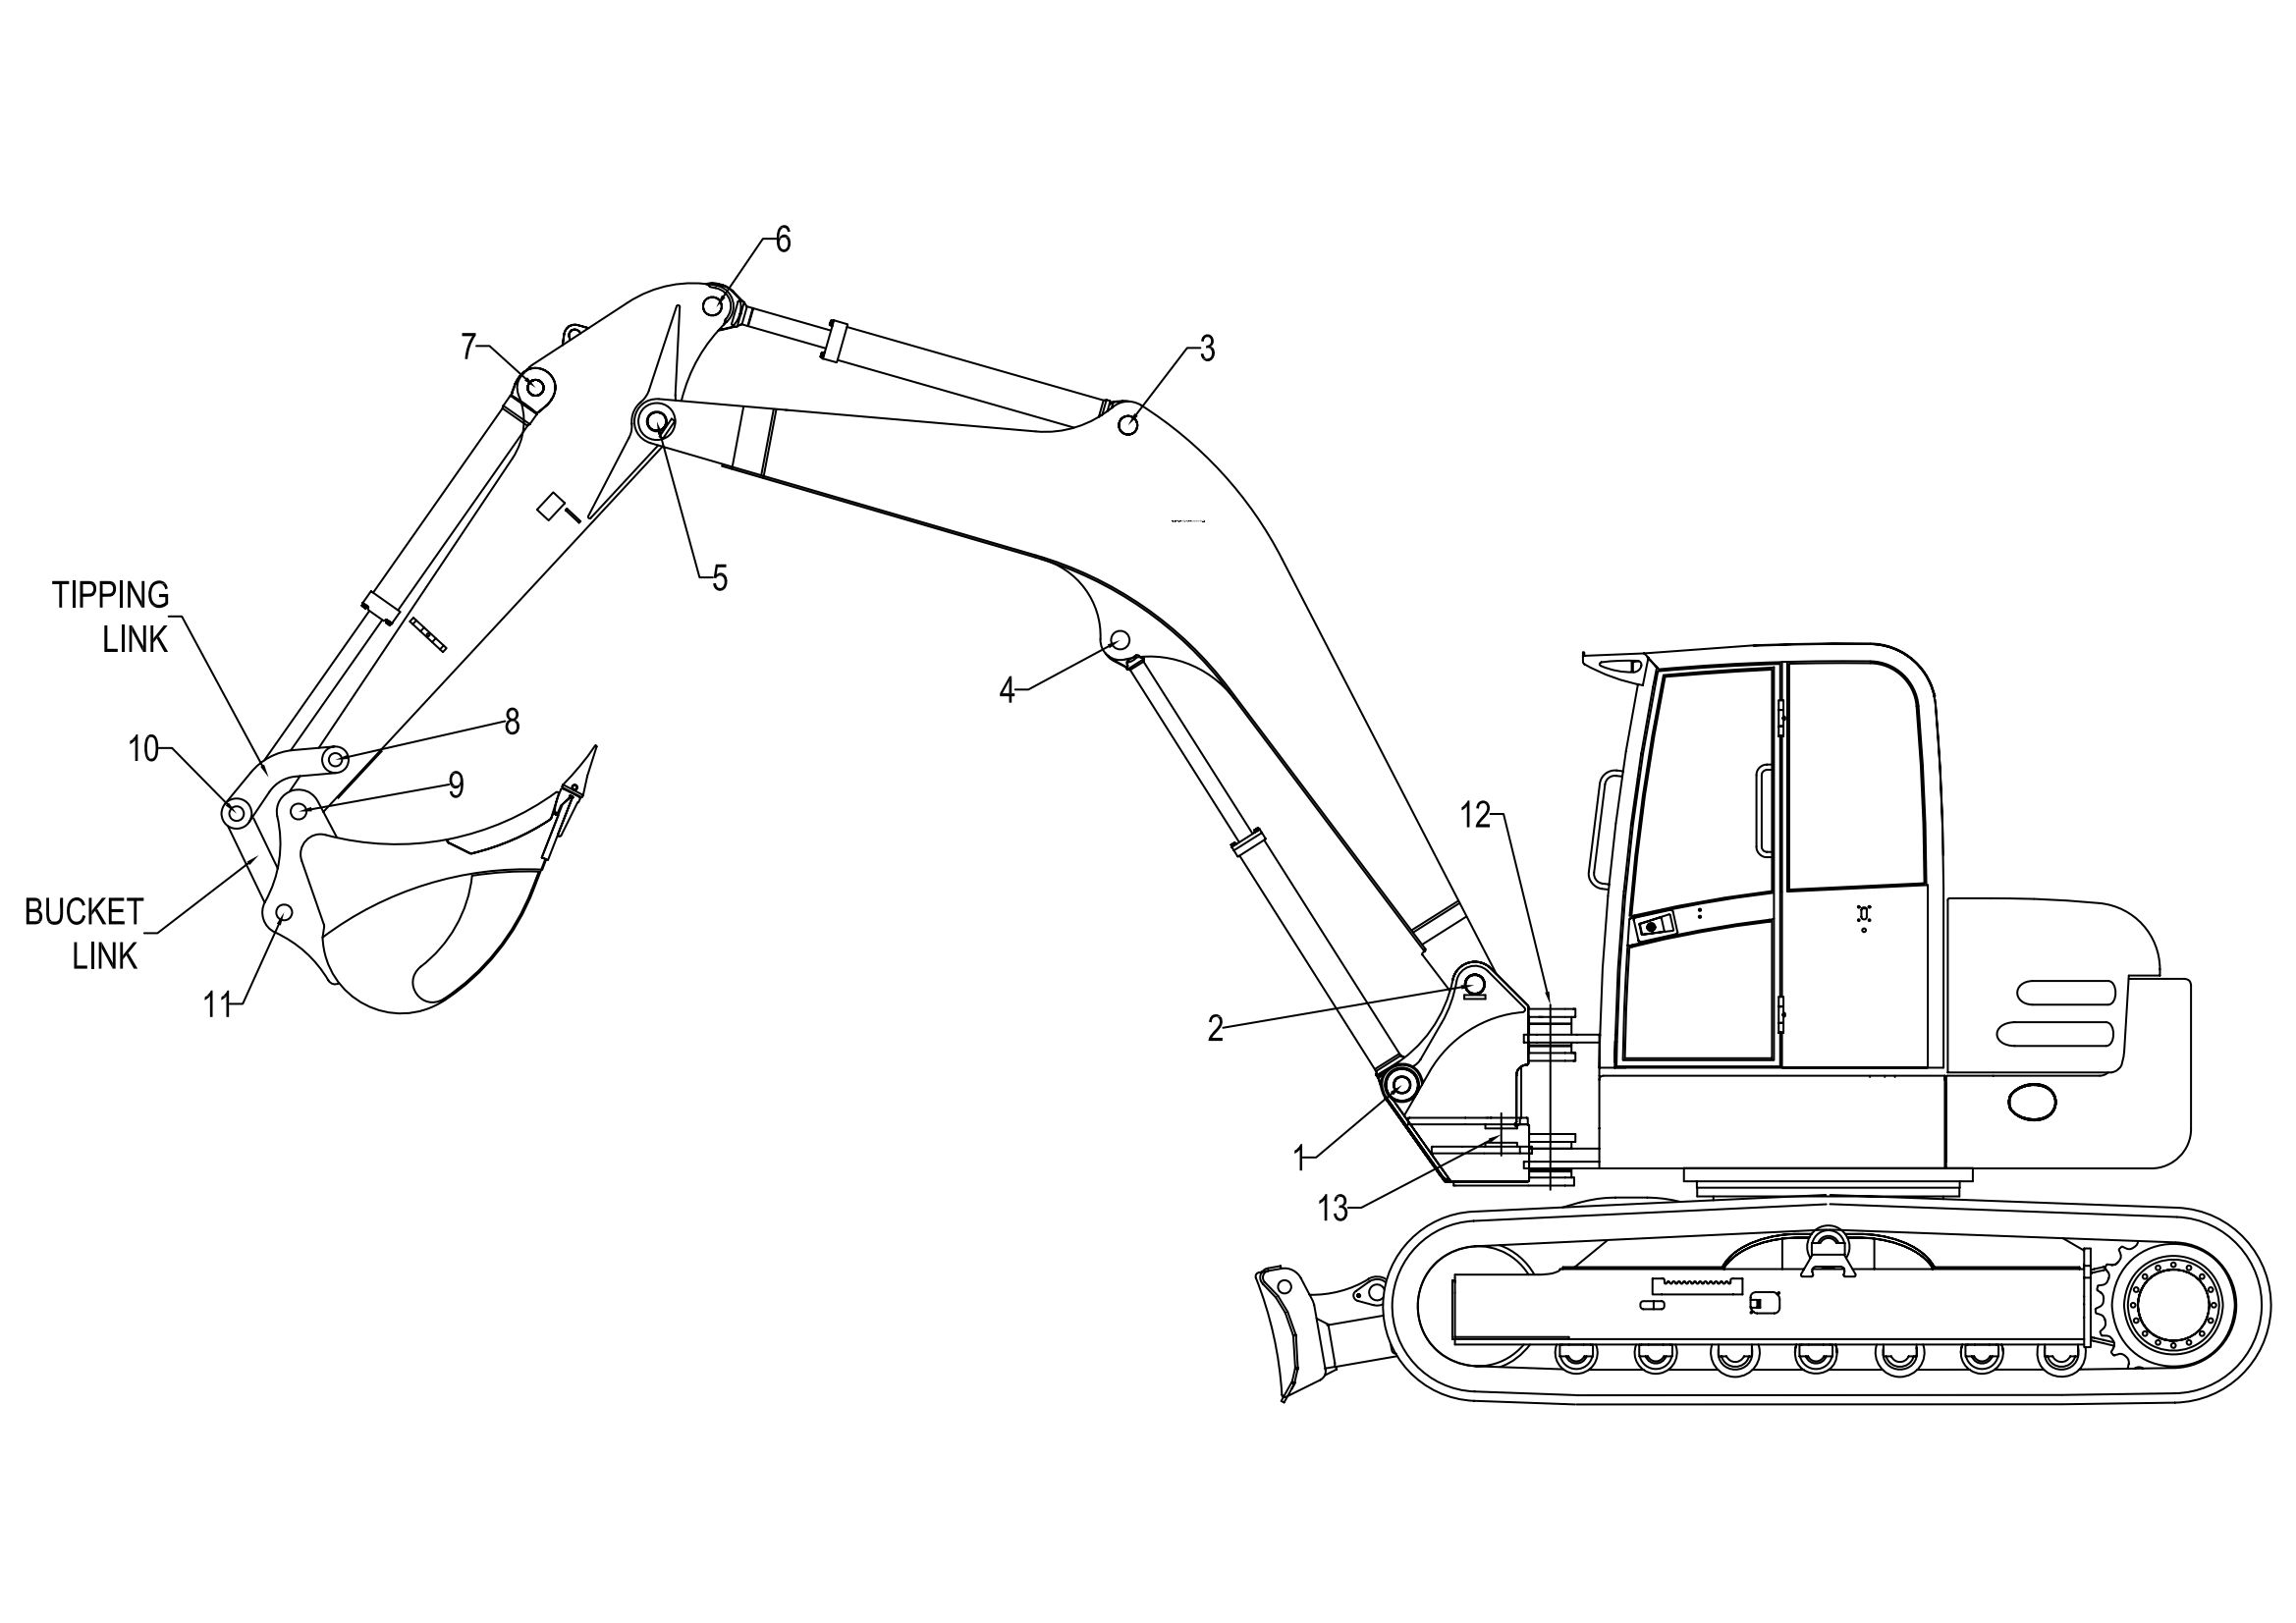
The diagram below shows the standard pin and bush positions on a hydraulic excavator boom, dipper (stick) and bucket linkage. Positions 1 through 13 cover every pivot point from the boom-foot at the slew through to the bucket quick-hitch. The two key compound joints — the tipping link and the bucket link (also called the H-link / dog-bone) — are also shown.
Position reference
| Position | Joint | Common name |
|---|---|---|
| 1 | Boom foot at slew frame | Boom pivot pin |
| 2 | Boom cylinder rod end (lower) | Boom ram pin (rod) |
| 3 | Boom cylinder base end | Boom ram pin (base) |
| 4 | Boom-to-dipper pivot | Knuckle pin |
| 5 | Dipper cylinder base end | Stick ram pin (base) |
| 6 | Dipper cylinder rod end | Stick ram pin (rod) |
| 7 | Bucket cylinder base end | Bucket ram pin (base) |
| 8 | Bucket cylinder rod end | Bucket ram pin (rod) |
| 9 | Tipping link upper pivot | H-link top pin |
| 10 | Tipping link to dipper | H-link middle pin |
| 11 | Bucket link upper pivot | Dog-bone top pin |
| 12 | Bucket link to bucket | Dog-bone bottom pin |
| 13 | Bucket pivot at dipper end | Bucket pivot pin |
The exact pin diameters, lengths and bush specifications vary between manufacturers and even between model years on the same machine, so always quote the machine make, model and serial number when ordering replacement pins and bushes.
Why pins and bushes wear out
Excavator pins and bushes operate under high cyclic load with limited lubrication. Common causes of premature wear include:
- Missed greasing intervals — most pivots need grease every 8–10 operating hours.
- Wrong grease grade — heavy-duty lithium-EP grease is needed; light bearing grease shears out under load.
- Worn seals allowing dirt and water into the bush bore.
- Hardened pin running in a hardened bush instead of the correct soft-on-hard pairing.
- Side-loading from twisting work such as trenching against the side of the bucket.
A worn pin/bush pair will show as visible play in the joint, an audible knock under load reversal, oval bush bores, and elongated grease grooves. Catching wear early — replacing a pin and bush set rather than letting the bore go oval into the parent material — is the difference between a one-day workshop job and a re-bored boom or dipper.
How to measure for replacement pins and bushes
If you are sourcing pins and bushes by dimension rather than part number, measure the following on the old pin before you remove the bush:
- Pin diameter at an unworn section (closest to the head, away from the bearing surface).
- Pin overall length including any retaining-bolt boss.
- Bush bore (inside diameter when removed) and bush outside diameter.
- Bush length — single bushes vs split-pair installations.
- Grease feed — single hole, cross-drilled, or pressure-fed via the boss.
Measurements should be taken with vernier callipers or, for accuracy, a micrometer; a ruler is not adequate on machined components.
Compatible machines
This pin and bush layout is typical of UK construction excavators and backhoes including:
- JCB — JS, JZ, 3CX, 4CX, 1CX and mini excavator ranges
- Caterpillar — 300-series mini, 3xx midi and 3xx large excavators
- Komatsu — PC mini, midi and large excavator series
- Hitachi Construction Machinery — Zaxis ZX series
- Kubota — KX, U and KX mini excavator ranges
- Takeuchi — TB compact excavator series
- Bobcat — E series mini excavators
- Volvo Construction Equipment — EC excavator series
- Doosan — DX series excavators
- Liebherr — R-series excavators
For a related identification chart covering loading-shovel pin positions (rather than excavator boom geometry), see our Loading Shovel Pin & Bush Guide.
Need help identifying the right pin or bush?
Send a clear photo of the joint, plus your machine make, model and serial number, and we will identify the correct pins and bushes from the OEM parts book. We supply genuine and quality aftermarket pins and bushes for all major construction brands, with same-day dispatch on stock items.
Contact us for a quote, or call 01255 323202 to speak to one of our parts team. Browse our full construction spare parts catalogue to source the rest of your rebuild kit at the same time.